Why RV Roof Seals Need Annual Inspection
Last Updated: November 15, 2026
Quick Summary
RV roof seals need annual inspection because sealant ages, dries out and pulls away from seams from sun, rain, wind and temperature swings. A yearly check catches small cracks while they are still cheap to fix, before water reaches insulation, wood and walls.
Inspect at least once a year, and twice a year if you travel often or park under trees.
Sort findings into cosmetic, early-warning and active-intrusion levels, each with a different response.
Reseal only areas showing early-warning or active-intrusion findings, not the whole roof on a schedule.
Check penetrations like bolts, vents and fittings first, since they are the most common leak points.
Get a professional assessment when water is visible inside, the deck feels soft, or seams have separated widely.
Table of Contents
Why Annual RV Roof Seal Inspections Prevent Water Damage
Water is the quiet enemy of every RV. A small crack in the sealant can let rain slip into the roof, the walls and the floor before you notice anything inside. A common pattern across RV owners is waiting too long, then facing a repair bill far larger than the cost of a simple check.
That is why RV roof seals need annual inspection. Sealant ages, dries out and pulls away from seams. Sun, rain, wind and temperature swings all speed that up. A yearly look can catch problems while they are still cheap to fix. Waiting can lead to wet insulation, soft wood and mold.
Check your roof at least once a year. Owners who travel often, or who park under trees, should look twice a year, before and after the travel season. Trees drop branches and sap, and birds can peck at sealant. These are exactly the things a regular inspection is meant to catch.
Why regular inspections matter:
Small cracks grow into leaks over time
Water damage hides behind walls and ceilings
Early repairs cost far less than structural fixes
Regular checks give you a record of your roof's condition
Signs Your RV Roof Needs Resealing
Your roof often tells you it needs help before a leak shows up inside. The key is knowing which findings are cosmetic, which are early warnings, and which mean water is already getting in. That distinction is what separates an annual inspection from an automatic annual reseal, and it is where most owners either overpay for unnecessary work or wait until a small crack becomes a soft ceiling.
Cosmetic findings, note and monitor. Sealant that looks chalky or has a dull, oxidized surface is aging, but if it is still bonded and flexible, it is not yet failing. Dark streaks that wipe away with a mild cleaner are usually dirt or tree sap, not water intrusion. Hairline surface cracks that do not penetrate to the roof membrane are common on older sealant and can be logged for next year's check.
Early-warning findings, repair soon. Sealant that has pulled away from a seam, lifted at an edge, or developed cracks deep enough to catch a fingernail has lost its bond. Bubbling or blistering at a seam means water is already working under the sealant.
Active-intrusion findings, act now. Staining or dark streaks on the roof deck, soft spots in the ceiling or upper walls, a musty smell that does not clear, or peeling paint near the roofline all point to water that has already entered. At this stage, resealing alone may not solve the problem; the underlying deck or insulation may need drying or replacement. Stop inspecting and start documenting for a professional assessment.
Inside the RV, watch for these clues:
Stains on the ceiling or upper walls
Soft spots in the floor near the walls
A musty smell that does not go away
Peeling paint or wallpaper near the roofline
The inspection-versus-reseal rule. Annual inspection does not mean annual resealing. Reseal only the areas that show early-warning or active-intrusion findings. A roof with intact, flexible sealant at every seam and penetration does not need a full reseal just because a year has passed. Spot repairs on failing seams are generally a more targeted approach than a blanket reseal schedule.
Watch out: a finding that looks cosmetic on the surface can hide a separated seam underneath. If you press gently on a chalky seam and it moves or feels spongy, treat it as an early-warning finding even if the top surface looks intact.
The article sorts roof findings into three levels, each calling for a different response.
Finding level | Typical signs | Response |
Cosmetic | Chalky, oxidized sealant; dark streaks that wipe off; hairline surface cracks | Note and monitor |
Early warning | Sealant pulled from seam; deep cracks; bubbling or blistering | Repair within a few weeks |
Active intrusion | Deck staining; soft ceiling spots; persistent musty smell; peeling paint | Act now; get professional assessment |
RV Roof Inspection Checklist for Seams, Penetrations and Edges
Use this checklist each time you inspect. Work slowly and check each area fully.
Seams along the length of the roof, including overlaps
Edges and the perimeter where the roof meets the walls
Vents, fan housings and roof hatches
Skylights and their frames
Antenna, solar and air conditioner mounting points
Ladder and rail attachment points
Gutter or drip edge connections
Any spot where the roof surface shows cracks, dents or pooling water
Penetrations are the most common leak points. Every bolt, screw and fitting that goes through the roof is a place where sealant must hold. Pay close attention to these areas.
How to Inspect RV Roof Seals Step by Step
Follow these steps for a thorough inspection. Set aside about an hour, and pick a dry, calm day in good light.

What you'll need:
A sturdy ladder with a stabilizer
A bright flashlight
A soft brush and mild cleaner
A plastic putty knife
A notepad or phone to record what you find
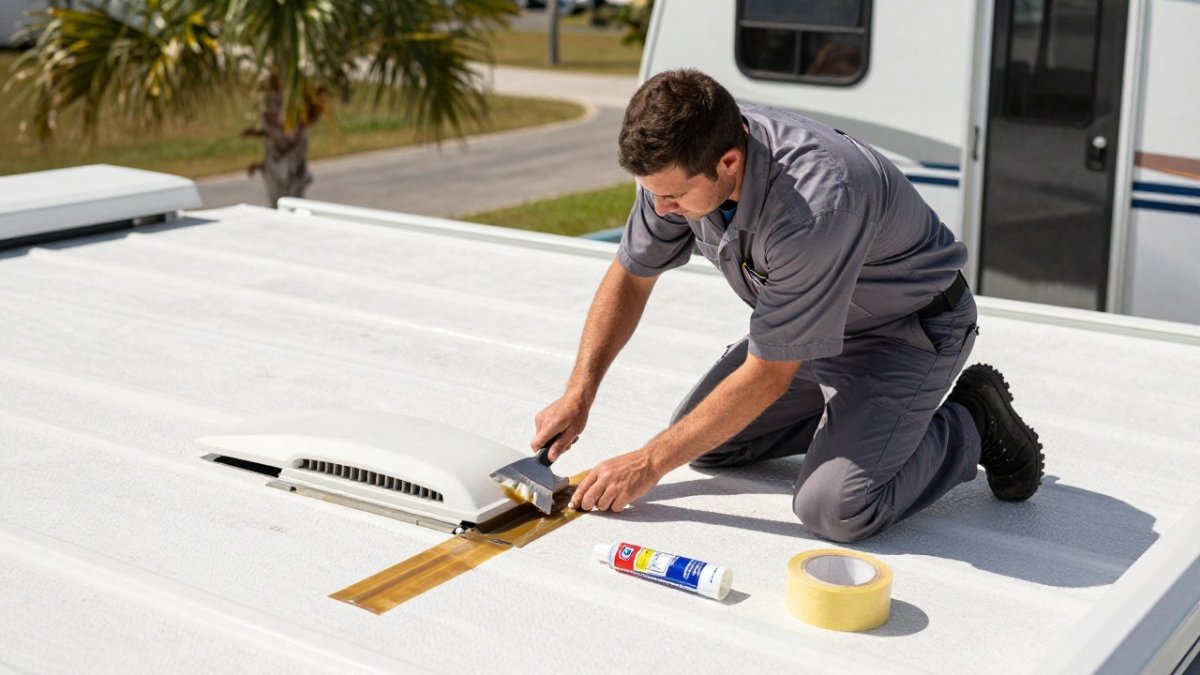
Step 1: Clean the roof surface. Remove leaves, dirt and debris so you can see the seams clearly. Expected result: a clear view of every seam and edge.
Step 2: Check the seams. Run your eyes and fingers along each seam. Look for cracks, gaps, lifting or missing sealant. Expected result: a list of any weak spots.
Step 3: Inspect penetrations. Examine each vent, fitting and mounting point. Look for sealant that has pulled away or cracked. Expected result: confirmed condition of every fitting.
Step 4: Press gently on the sealant. Healthy sealant feels firm and stays bonded. Soft, crumbly or springy sealant needs attention. Expected result: you know which areas feel weak.
Step 5: Check the interior. Look at the ceiling and upper walls below each suspect area for stains or moisture. Expected result: you know whether water has already entered.
Step 6: Record your findings. Write down the location and condition of each issue, and take photos. Keep these notes to track changes next year.
Inspection is not the same as resealing. An inspection finds the problem. Resealing fixes it. Keep your notes so you can tell whether a spot is getting worse.
Roof-Material Differences: Rubber, TPO, Fiberglass and Metal
Not all RV roofs age the same way. Knowing your material helps you know what to look for.
Rubber (EPDM): Watch for shrinking, cracking and seams that have pulled apart. Use sealant made for rubber roofs.
TPO: Check for surface chalking and small cracks near seams. Heat and UV exposure cause most damage.
Fiberglass: Look for hairline cracks in the gelcoat and around fittings. Sealant around the edges is often the first thing to fail.
Metal: Check for rust, scratches in the coating and loose fasteners. Water tends to collect at low spots.
Always confirm which sealant your roof manufacturer recommends. The wrong product can fail fast or damage the roof.
Roof Access Safety and What to Do After You Find a Defect
Getting onto the roof is where most DIY inspections go wrong. Never climb onto a wet or icy roof. Use a ladder placed on firm, level ground, and have someone hold it. Do not step on fragile fittings or skylights, and keep at least one hand free.
If you find a defect, take these steps:
Mark the area and photograph it.
Clean and dry the spot before any repair.
Make a temporary fix only if the damage is minor and you can do it safely.
Check the inside of the RV for any water that has already gotten in.
Schedule a full repair before your next trip.
Many owners find that a small defect turns into a bigger job if left alone for even a few weeks.
What Resealing Costs and When to Call a Professional
Resealing scope depends on several variables: the length of the roof, the number of penetrations and seams that need work, the roof material (which determines the sealant), and whether any water damage has already occurred.
What drives the cost up or down. Job size, the number of seams and penetrations, the roof material and the extent of any damage all affect the final scope of work.
DIY versus professional. A careful owner can handle a small spot reseal on an accessible seam, cleaning, drying, and applying the manufacturer-recommended sealant. That is a reasonable weekend job. A professional may be worth considering when water is visible inside the RV, the deck feels soft or spongy, roof panels are damaged, seams have separated over a large area, or you cannot safely access the roof. For larger jobs, the labor and material cost of a proper reseal often favors a technician who does this work regularly.
Getting a real number. Sharp RV Services does not publish a fixed price list because the variables above change the job so much. The reliable path is to get a quote based on your RV's length, roof material, and the findings from your inspection. You can see the full list of services we offer or contact us for a quote. For a sense of local pricing, read our guide to RV repair pricing in Pinellas County.
What to have ready before you call. Photograph each defect, note its location (seam, penetration, edge), and write down your roof material and RV length. A technician can give a far more accurate estimate from photos and a description than from a vague "my roof leaks" call. If you have kept inspection records from prior years, mention whether the spot is new or has been worsening, that history helps distinguish a simple reseal from a repair.
Sharp RV Services comes to you, so you do not have to drive your RV to a shop. We aim to give you clear, honest pricing before any work begins.
Watch out: when comparing quotes, confirm what is included, such as surface prep and the sealant used. Ask what sealant will be used and whether cleaning and drying are included before you compare numbers.
Be ready for an annual check. The small cost of an inspection is far less than the cost of water damage.
Frequently Asked Questions
How often should you inspect RV roof seals?
Inspect RV roof seals at least once a year, and twice a year if the RV is parked outdoors, sees heavy sun or rain, or is used for frequent travel. Many owners schedule one check in spring before travel season and another in fall after it. Checking at these times catches cracked or lifting sealant before rain or temperature swings turn a small gap into water damage inside the walls and ceiling.
Can a small crack in RV roof sealant cause water damage?
Yes. A tiny crack or gap in sealant can let rain run into the roof structure, where it soaks insulation and wood framing. Water often travels sideways before it shows up as a stain, so the visible damage may be far from the actual entry point. Catching a small crack early is far cheaper than repairing rot and mold later.
Can you inspect RV roof seals yourself?
Yes, most owners can complete a visual inspection of seams, vents, skylights and edges with a flashlight and a notepad. Use the RV roof inspection checklist to record each area. Roof access carries real fall risk, so use a stable ladder, avoid wet or sun-heated surfaces, and have someone spot you. If you see soft spots or active leaks, have a professional assess the damage.
How much does it cost to reseal an RV roof?
Resealing cost depends on roof size, the extent of deterioration, the sealant type and access requirements, so there is no single fixed price. For current pricing on your RV, contact Sharp RV Services through the website for a quote. Get the scope of work in writing before the job starts so there are no surprise charges.
Comments